
A tested, step-by-step guide to building a do it yourself robot costume from cardboard, with real measurements, safety checks, LED wiring tips, and cost breakdowns.
Do It Yourself Robot Costume
A do it yourself robot costume is the rare Halloween project that looks expensive, costs almost nothing, and can be finished in a single weekend. After building more than a dozen cardboard costumes for family, school events, and brand activations, we have learned that the difference between a droopy box and a costume people stop to photograph comes down to four things: box selection, weight distribution, paint prep, and lighting. This guide covers all four with exact measurements and materials, so you are not guessing halfway through.

Quick Answer: A do it yourself robot costume needs one sturdy cardboard box for the torso, a smaller box for the helmet, dryer vent hose for arms, and metallic spray paint. Cut arm and neck holes, prime before painting, add battery LED lights, and pad the shoulders. Total build time is about three hours for roughly 25 dollars.
Why Cardboard Still Beats Store-Bought Robot Costumes
Cardboard wins on three measurable fronts: cost, fit, and originality. The National Retail Federation reported that Americans planned to spend about 3.8 billion dollars on Halloween costumes in a single season, with the average person spending over 100 dollars on the holiday overall. A cardboard robot build lands between 20 and 30 dollars if you already own scissors and a glue gun.
Fit matters more than most people realize. Mass-produced costumes are sized for averages, which is why children constantly trip on hems. When you build your own, you measure the actual wearer, so the torso box sits above the hips and the leg openings clear the knees. That single adjustment is the biggest predictor of whether a kid keeps the costume on past the second house.
Definition: What Counts as a DIY Robot Costume?
DIY robot costume: a wearable costume assembled from household or craft-store materials, typically corrugated cardboard, metallic tape or paint, flexible tubing for limbs, and battery-powered lights, designed to read visually as a mechanical humanoid without any commercial costume components.
Materials List and What Each One Actually Does
Buy these before you start. Mid-project store runs are where DIY costumes die.
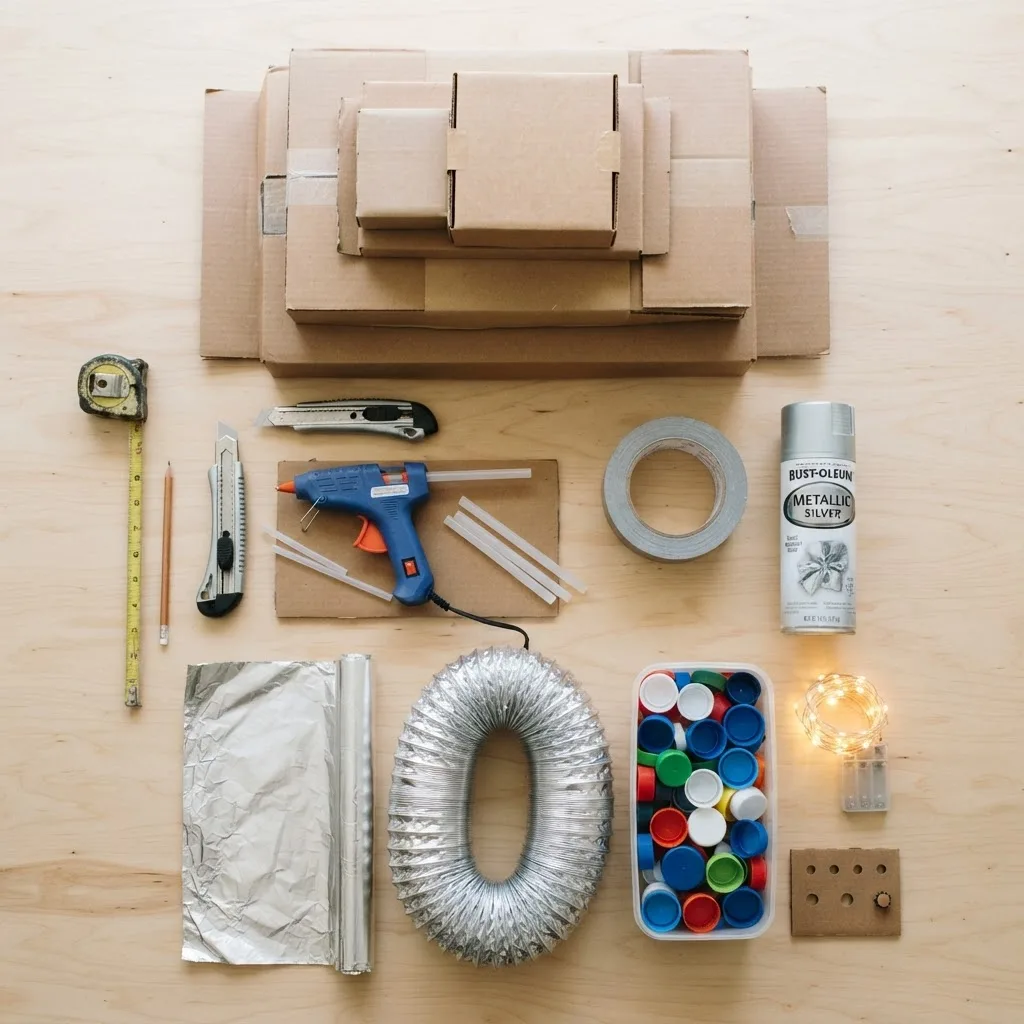
- One large corrugated box — 18 to 20 inches wide, 22 to 24 inches tall for a child; 22 by 28 inches for an adult. Double-wall corrugate holds its shape far better than single-wall shipping boxes.
- One smaller box for the helmet — should clear the wearer's head by 2 inches on every side.
- Silver or gunmetal spray paint — two cans minimum. Cardboard absorbs the first coat almost entirely.
- Spray primer — the step nearly everyone skips, and the reason most homemade costumes look blotchy.
- Flexible dryer vent hose, 4-inch diameter — the single most convincing robot detail for under 10 dollars.
- Aluminum foil tape or duct tape — for seams, edges, and panel lines.
- Hot glue gun plus low-temp glue sticks — low-temp prevents warping thin cardboard.
- Battery-powered LED string lights and translucent bottle caps or jar lids — for the chest console.
- Two lengths of 1-inch nylon webbing or wide ribbon — internal shoulder straps.
- Craft foam or pool-noodle scraps — shoulder and helmet padding.
Step 1: Measure and Cut the Torso
Measure the wearer's shoulder width, then add 3 inches. That number is your minimum box width. Mark the neck hole in the center of the top flap and trace it with a bowl roughly 1 inch wider than the neck circumference. Arm holes go on the sides, centered 2 inches below the top edge, cut as 5-inch ovals so the shoulders can rotate.
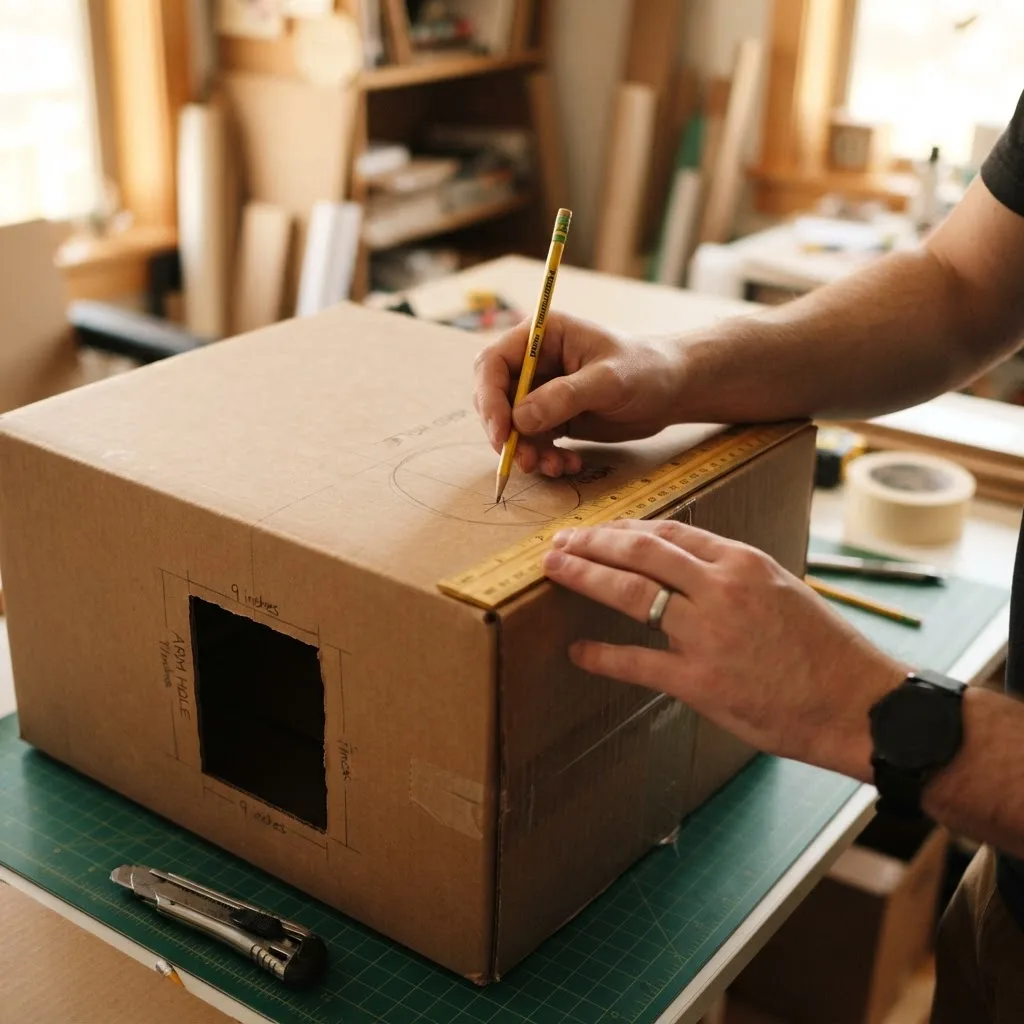
Cut with a fresh utility blade, not scissors. A dull blade crushes the corrugate and leaves fuzzy edges that never paint cleanly. Score fold lines with the blade tip at about one-third depth rather than cutting through. After cutting, reinforce the inside corners with tape triangles. This one-minute step is what stops the torso from collapsing after two hours of wear.
Weight Rule Worth Memorizing
Keep the finished torso under 10 percent of the wearer's body weight. A 60-pound child should not carry more than 6 pounds. Every added greeble, panel, and battery pack counts, so weigh the assembly with a bathroom scale before adding decoration.
Step 2: Prime, Then Paint
Prime first, always. Bare cardboard drinks solvent and swells, which produces the wavy, cratered surface that instantly signals a rushed build. One light coat of grey spray primer seals the fibers so the metallic topcoat sits flat and reflects light properly.
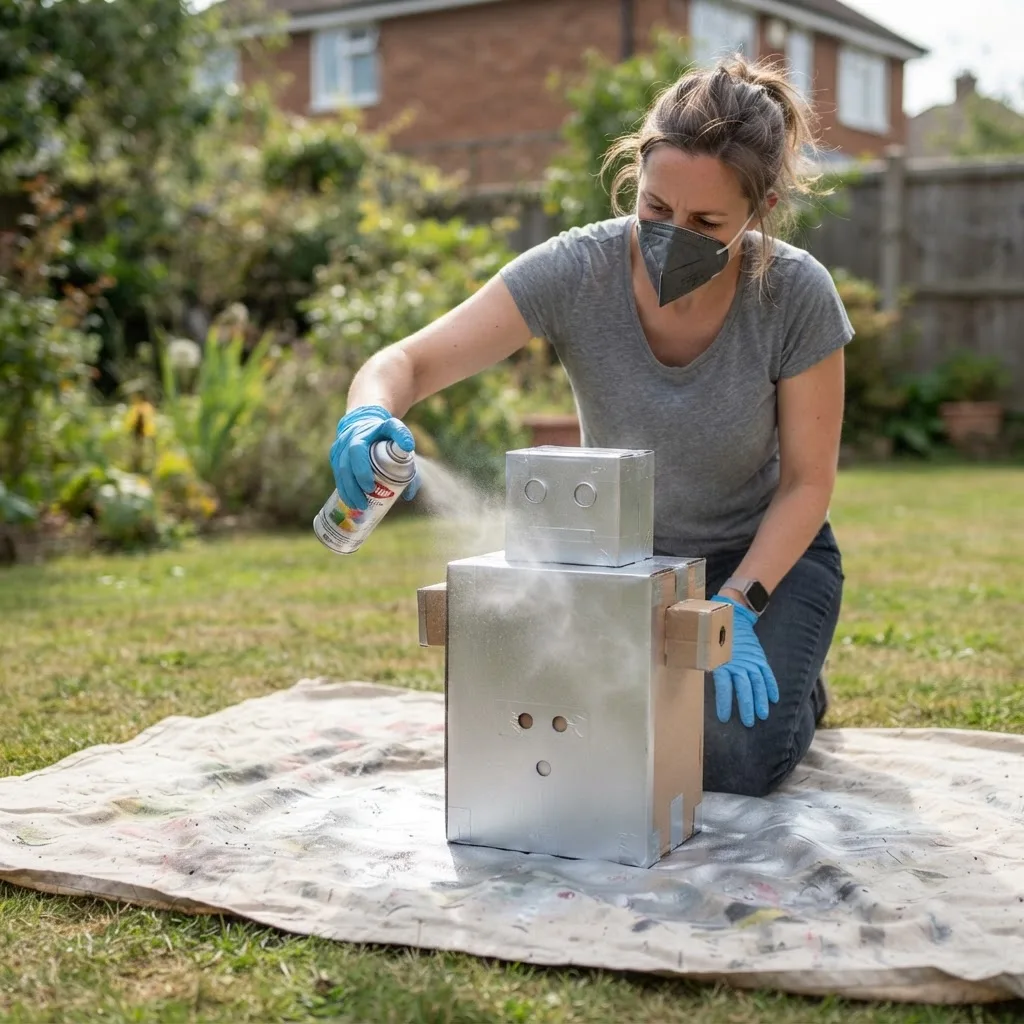
Spray outdoors or in a garage with the door open, holding the can 10 to 12 inches away and moving in steady passes. Apply two thin metallic coats with 20 minutes of drying between them. Thick single coats stay tacky for hours and pick up lint. For a used, industrial look, dry-brush black acrylic into the panel lines once the silver has cured, then wipe the raised areas with a paper towel.
Step 3: Build the Helmet
The helmet decides whether the costume reads as a robot from 20 feet away. Cut a wide rectangular visor opening across the front, roughly 3 inches tall and spanning the eyes, then glue a strip of black tulle or window screen behind it. The wearer sees out; onlookers see a dark machine face.
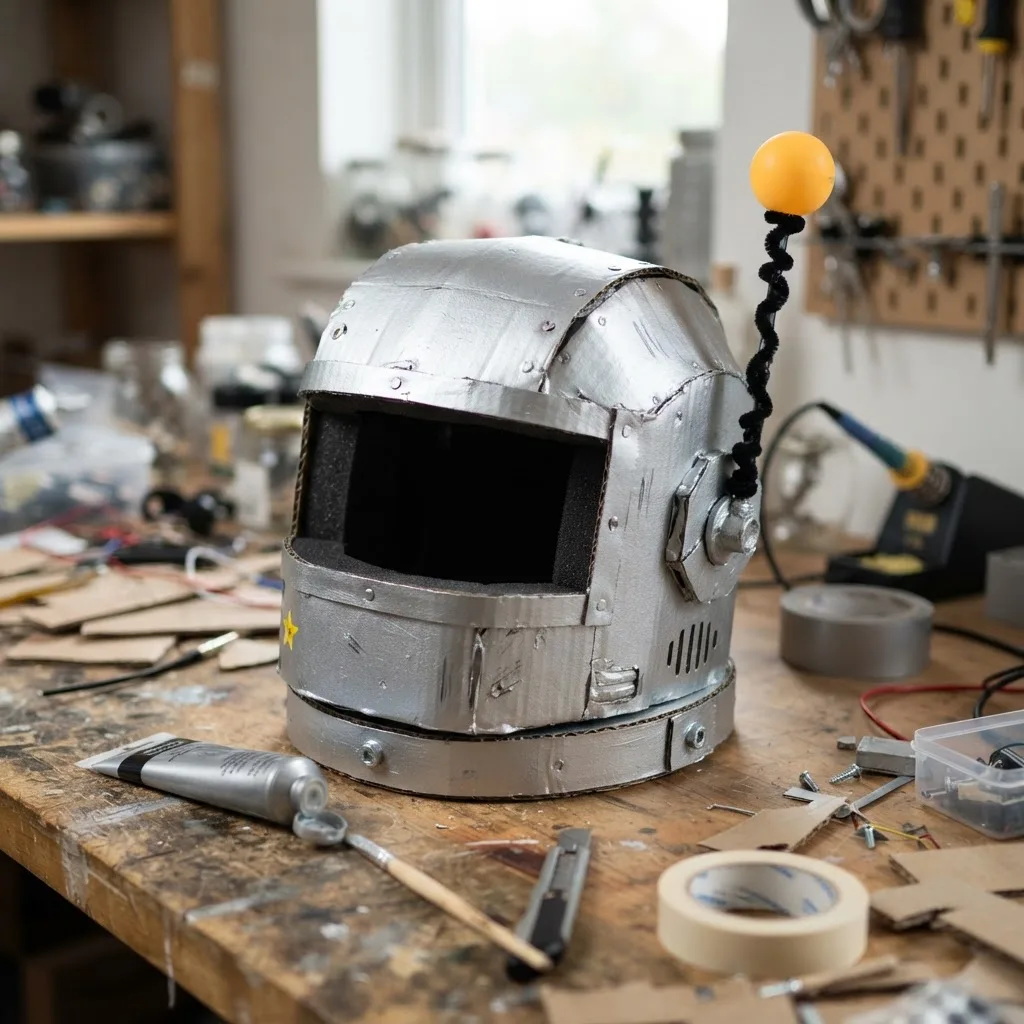
Glue foam strips inside at the crown and temples so the helmet rests on the head instead of the ears. Add an antenna from a pipe cleaner topped with a painted ping-pong ball. Critically, verify peripheral vision before you decorate: have the wearer stand still and identify objects held at 45 degrees on both sides. If they cannot, widen the visor. Restricted vision is the leading cause of costume-related trips.
Step 4: Wire the Chest Console
Use only battery-powered LED string lights, coin-cell tea lights, or a small USB power bank. Never route household current through a costume. Cut holes sized to translucent bottle caps or clear jar lids, hot glue the lids in place from the inside, and press one LED behind each so the light diffuses instead of glaring.
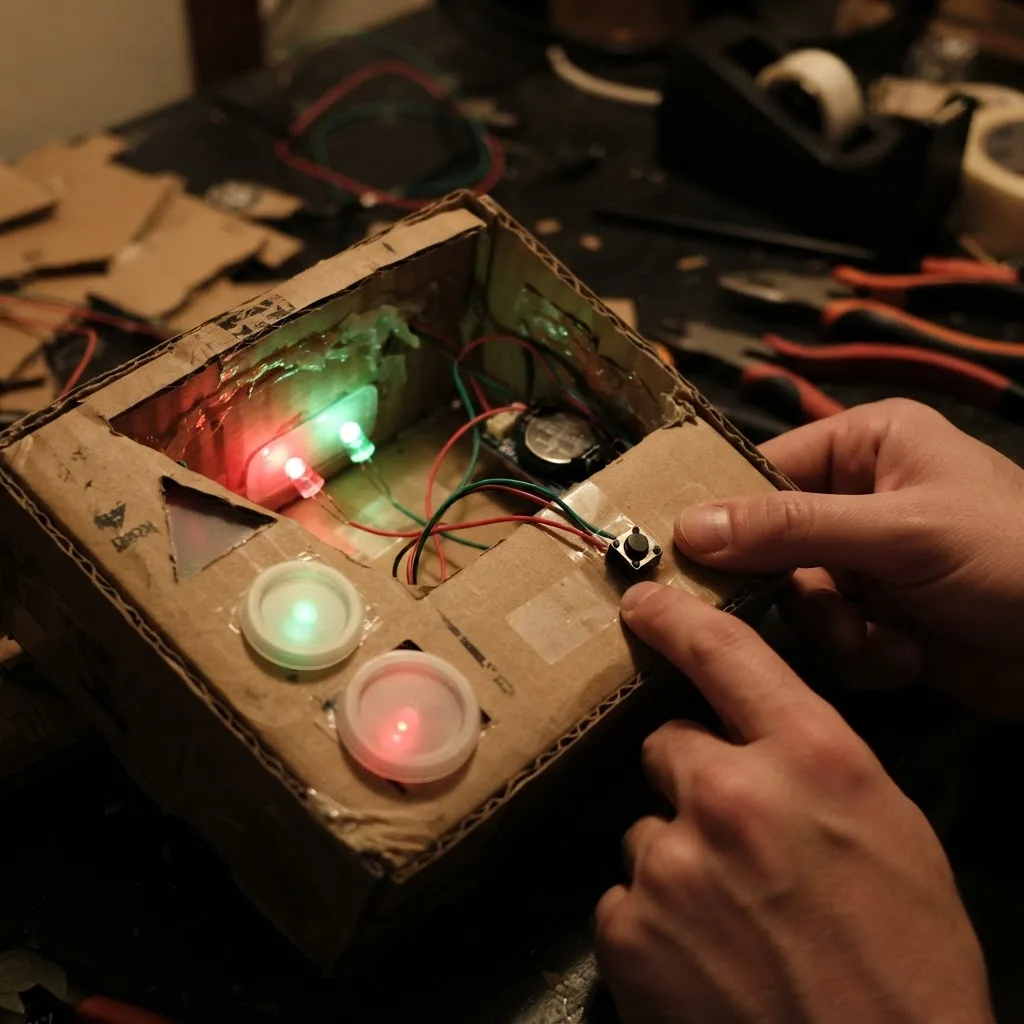
Tape the battery pack to the inside of the torso where the wearer can reach the switch through an arm hole. Add a cardboard access flap so batteries can be swapped without dismantling anything. Basic AAA LED strings typically run 8 to 20 hours, which comfortably covers an evening, but carrying spares costs nothing.
Step 5: Arms, Legs, and Finishing Details
Slide 18-inch sections of dryer vent hose over each arm and secure them to a long-sleeve shirt with safety pins from the inside, not to the box. Attaching limbs to the torso restricts movement and tears the cardboard at the arm holes.
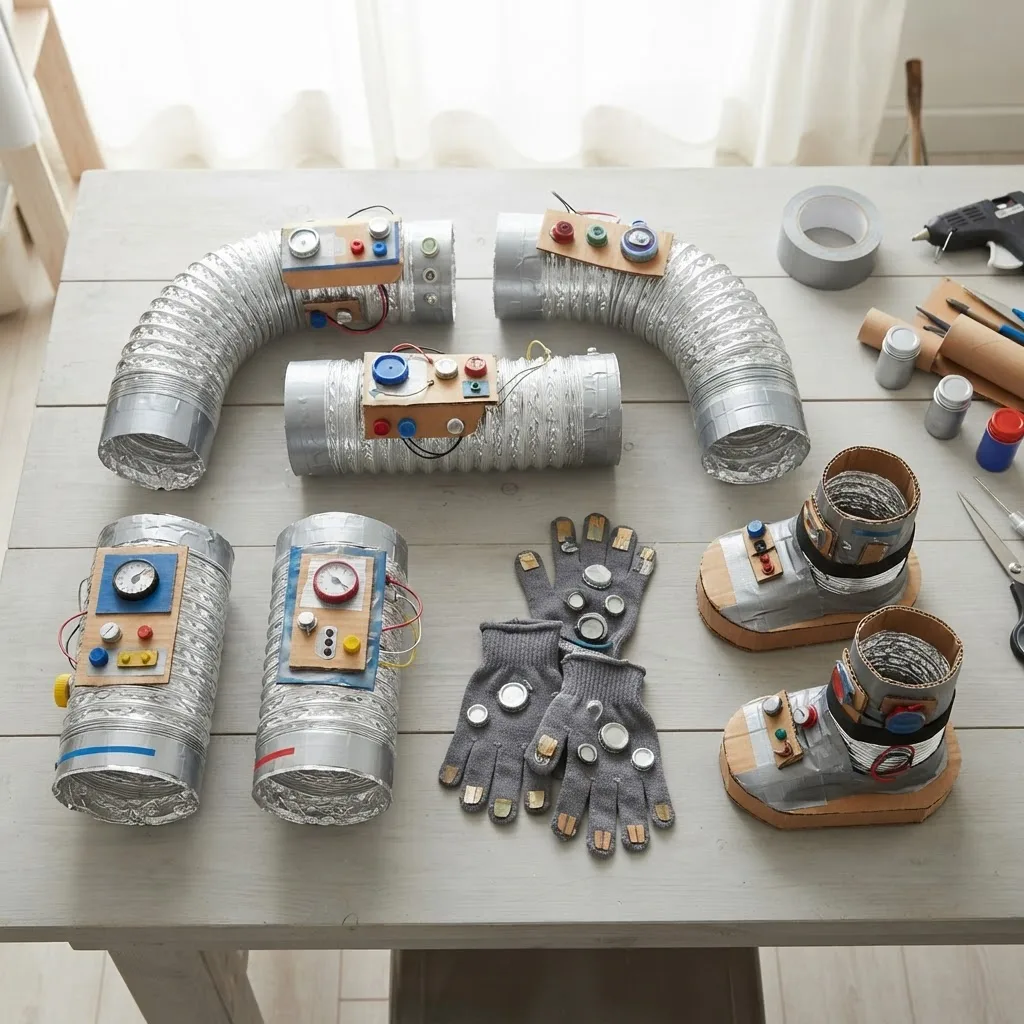
For legs, wrap painted cardboard cuffs around the shins and fasten them with velcro so they open for walking. Silver gloves and foil-taped boot covers finish the silhouette. Then add reflective tape along the back, sides, and helmet. Safe Kids Worldwide has reported that children are roughly twice as likely to be struck and killed by a car on Halloween as on any other night, which makes reflective tape a functional part of the design rather than a decoration.
Cost and Effort Comparison
| Approach | Typical Cost | Build Time | Custom Fit | Durability |
|---|---|---|---|---|
| Cardboard DIY robot | 20-30 USD | 3 hours | Yes | 1-2 nights |
| Foam and EVA build | 60-90 USD | 8-12 hours | Yes | Multiple seasons |
| Store-bought robot suit | 45-80 USD | 0 hours | No | 1-2 seasons |
| Rented character suit | 90-150 USD | 0 hours | Partial | Return required |
Common Mistakes We See Every Year
- Skipping primer. Produces a warped, patchy finish that no amount of extra paint fixes.
- Gluing arms to the torso. Restricts motion and rips the box at the stress points.
- Cutting the neck hole too small. The wearer cannot get in or out without help.
- Ignoring bathroom logistics. Use side latches or velcro so the torso opens quickly.
- Overloading with detail. Weight kills enthusiasm faster than a plain design ever will.

One field-tested tip: build a doorway test into your process. Measure your widest interior door, then confirm the finished torso clears it with the wearer's arms down. We have watched a beautiful build get stuck at a party entrance because nobody checked.
If you enjoy translating hands-on projects like this into clear, structured guides, the editorial team at ZoneTechify publishes practical tutorials, and WebPeak covers the technical side of getting them discovered. Our content writing service applies the same step-by-step documentation approach used in this guide.
Key Takeaways
- A complete cardboard robot costume costs 20 to 30 dollars and takes roughly three hours.
- Double-wall corrugate plus taped internal corners prevents mid-evening collapse.
- Priming before metallic spray paint is the single biggest visual upgrade.
- Keep total costume weight under 10 percent of the wearer's body weight.
- Use only battery-powered LEDs, and add reflective tape for night visibility.
- Attach vent-hose arms to clothing, never to the torso box.
Frequently Asked Questions (FAQ)
How long does it take to make a robot costume from cardboard?
Plan for about three hours of active work spread across two days. Cutting and assembly take roughly 90 minutes, priming and two paint coats need another hour with drying time between them, and lights plus final details take 30 minutes. Rushing the paint stage is the most common regret.
What is the best box size for a DIY robot costume?
Measure the wearer's shoulder width and add three inches for the box width. For most children, an 18 by 22 inch double-wall box works well; adults need roughly 22 by 28 inches. The torso should end above the hips so the wearer can walk and sit without the box digging in.
How do I add lights to a robot costume safely?
Use battery-powered LED string lights or coin-cell tea lights only, never household wiring. Mount the battery pack inside the torso within arm's reach of a switch, diffuse each LED behind a translucent bottle cap, and build a small access flap so batteries can be changed without taking the costume apart.
Will a cardboard robot costume survive rain?
Not for long. Corrugated cardboard softens within minutes of steady rain. Two coats of clear acrylic sealer buy you a light drizzle, but the practical fix is a backup plan: keep a poncho nearby, and store the costume flat and dry between wears to prevent warping.
Can adults wear a homemade cardboard robot costume?
Yes, with three adjustments. Use a larger double-wall box, add wide nylon shoulder straps inside to transfer weight off the collarbone, and check doorway clearance before the event. Adults also carry heavier lighting comfortably, so a bigger chest console and brighter LEDs become realistic options.
What can I use instead of dryer vent hose for the arms?
Stacked toilet paper or paper towel tubes painted silver work well and cost nothing. Pool noodles sliced into rings, foil-wrapped foam pipe insulation, or silver leggings with taped ring details all read convincingly as robotic limbs from a few feet away.